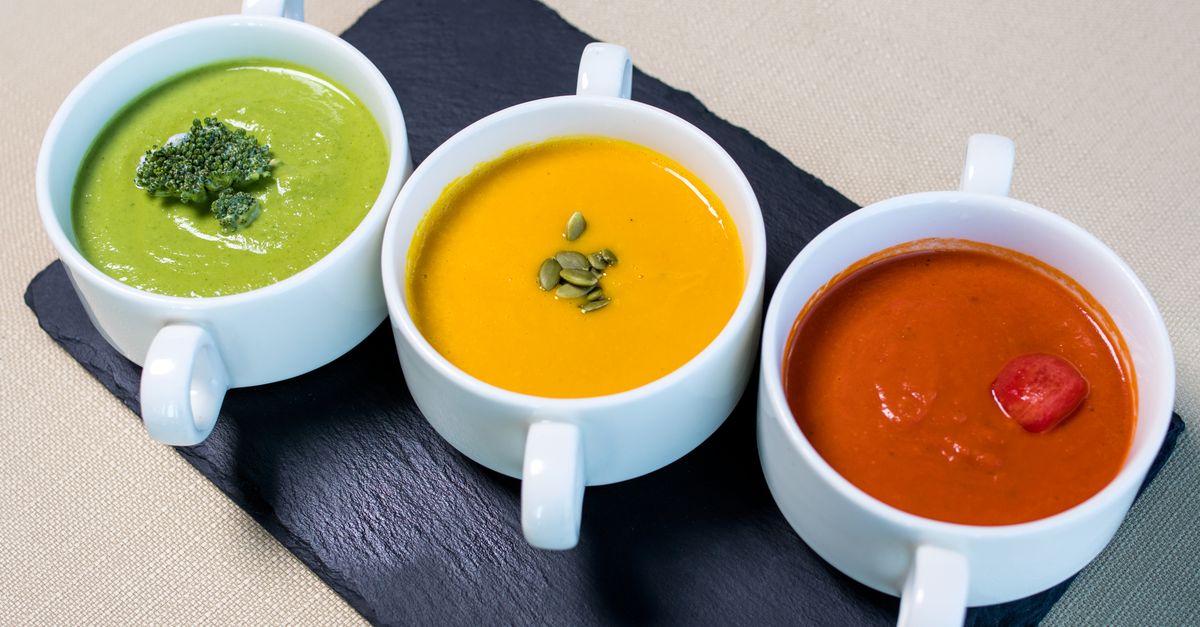
Why Your Homemade Soup is Bland (And The Flavor Secrets That Changed Everything For Me)
You’ve spent an hour chopping, simmering, and stirring, convinced this batch of homemade soup will finally be the comforting, flavor-packed masterpiece you crave. You ladle it into a bowl, take that first hopeful spoonful… and it’s… fine. Bland. Uninspired. It tastes vaguely of its ingredients, but lacks that rich, satisfying depth you get from your favorite restaurant or even a good canned soup. It’s disheartening, isn’t it? You followed a recipe, used fresh vegetables, maybe even homemade stock, but it still falls flat. I’ve been there countless times, staring into a pot of what should have been delicious, wondering where I went wrong.
The truth is, most home cooks miss a few crucial, often counter-intuitive steps that elevate soup from ‘okay’ to ‘oh wow.’ It’s not about expensive ingredients or complicated techniques; it’s about understanding flavor layering and intentional development. Once I embraced these principles, my soups were irrevocably transformed. No more bland broth, no more watery vegetables. Just rich, robust, utterly delicious soup, every single time.
Key Takeaways
- Embrace the art of browning aromatics and meat to build deep, foundational flavors before adding liquid.
- Layer your seasonings strategically, tasting and adjusting at multiple stages of cooking, not just at the end.
- Understand the transformative power of acidic finishes and rich enhancers to brighten and deepen your soup’s profile.
- Avoid over-dilution by using concentrated liquids and reducing them effectively for intense flavor.
The Fatal Flaw: Skipping the Sauté Stage (Or Doing It Wrong)
The biggest mistake I see, and one I made for years, is treating the initial sauté of aromatics (onions, carrots, celery, garlic) as a mere pre-step to adding liquid. This is where your soup’s entire flavor foundation is built, or utterly neglected. Think of it like building a house: you can’t skip the foundation and expect stability.
Most recipes will tell you to ‘sauté until softened,’ and many of us comply by cooking until the vegetables are translucent, maybe five minutes. But ‘softened’ isn’t ‘flavor developed.’ For true depth, you need to coax out the natural sugars through browning.
What changed everything for me was learning to treat aromatics, especially onions, with reverence. Instead of five minutes, I now dedicate 10-15 minutes, sometimes even 20, to a slow, gentle sauté over medium-low heat. I’m not just softening them; I’m caramelizing them. The onions turn a rich golden brown, developing complex, sweet, and savory notes that form the backbone of the soup. The fond (the browned bits) that sticks to the bottom of the pot? That’s pure flavor gold, ready to be scraped up by your stock.
If you’re adding meat to your soup, this step is even more critical. Brown your meat first, thoroughly, until it has a beautiful crust. Remove it, then proceed with your aromatics, letting them pick up all those delicious meat residues. This creates an unparalleled depth that simply simmering unbrowned ingredients cannot achieve. This browning isn’t just aesthetic; it’s a chemical reaction (the Maillard reaction) that creates hundreds of new flavor compounds, making your soup inherently more complex and satisfying.
The Seasoning Scramble: Why ‘Taste at the End’ Is Too Late
Another common pitfall is the idea of only seasoning at the very end of cooking. While a final adjustment is crucial, waiting until the last minute means your seasonings are simply sitting on top of the flavors, rather than integrating and evolving with them. It’s like painting a mural on a wall that hasn’t been primed; the colors just don’t pop.
I’ve found that strategic, multi-stage seasoning is the secret weapon for truly flavorful soup. Here’s my breakdown:
- Initial Layer (with aromatics): As soon as your onions, carrots, and celery hit the pan, add a generous pinch of salt and a few grinds of black pepper. Salt helps draw out moisture, accelerating caramelization, and it begins to season the vegetables from the inside out. If using dried herbs like thyme or oregano, add them here too, letting them bloom in the hot oil for a minute before adding liquids. This toasts their essential oils, releasing their full aromatic potential.
- Mid-Cook Adjustment (after adding liquid): Once your stock or broth is in, bring it to a simmer, then taste. It will likely still be bland, but this is your chance to add more salt, pepper, and perhaps a bay leaf or two. Remember that as the soup simmers and reduces, the flavors will concentrate, so be conservative. You can always add more, but you can’t take it away.
- Final Polish (before serving): This is where you make precise adjustments. The soup has fully developed its flavors, and now you’re fine-tuning. This is also the stage for fresh herbs like parsley or cilantro, a squeeze of lemon juice, or a dash of hot sauce. More on these ‘finishing touches’ below.
The key is to taste, adjust, and re-taste. Don’t be afraid to take small spoonfuls throughout the cooking process. Your palate will learn what ‘needs more’ at each stage, and you’ll develop an intuitive sense for building flavor.
The Over-Dilution Dilemma: Watery Base, Watery Flavor
Many home cooks (including my past self) rely too heavily on plain water or a weak store-bought broth, then wonder why their soup tastes thin. The liquid you add is not just a medium for cooking; it’s a critical component of your flavor. Using water is fine for some delicate broths, but for a hearty, robust soup, it’s a death sentence for flavor.
My game-changer here was committing to better quality, concentrated liquids and understanding reduction. Instead of cheap, watered-down chicken or vegetable broth, invest in a higher quality, low-sodium version. Better yet, make your own. Homemade stock is a revelation for soup flavor, offering a depth that store-bought simply can’t match. If you can’t make your own, look for concentrated stock bases or bouillon pastes – they offer a much more potent flavor punch than cartons of liquid.
Beyond the choice of liquid, reduction is key. After adding your stock, resist the urge to immediately slap a lid on it and simmer. Allowing the soup to simmer uncovered for a period, especially initially, lets some of the water evaporate. This concentrates the flavors of all your ingredients, intensifying them significantly. I often let my soup simmer uncovered for the first 30-45 minutes, then cover it partially or fully for the rest of the cooking time, depending on how much liquid I want to retain.
For an even more intense flavor, consider simmering your stock with some dried mushrooms or a parmesan rind before adding it to the soup. These ingredients release powerful umami notes that will give your soup a richness you won’t believe.
The Missing Punch: Overlooking Acid and Umami Boosters
This is the secret weapon that truly separates good soup from extraordinary soup: finishing with a touch of acid and boosting umami. Most recipes don’t emphasize this enough, but it makes an enormous difference. Think of it like this: salt provides savoriness, but acid provides brightness and makes all other flavors pop. Umami provides a deeper, savory satisfaction that rounds everything out.
Here are my go-to finishers and why they work:
- Lemon Juice or Vinegar (Acid): A squeeze of fresh lemon juice or a splash of apple cider vinegar or red wine vinegar right before serving is a revelation. It brightens dull flavors, cuts through richness, and adds a zesty complexity. Start with a small amount (1-2 teaspoons for a big pot) and taste. You won’t necessarily taste ‘lemon’ or ‘vinegar,’ but the soup will suddenly taste more vibrant and balanced.
- Umami Bombs:
- Parmesan Rind: Adding a spent parmesan rind to your simmering soup is pure magic. It slowly dissolves, infusing the broth with deep, nutty, savory umami. Remove it before serving, but its essence will remain.
- Soy Sauce or Fish Sauce: A dash or two can add incredible depth without making the soup taste Asian. These fermented sauces are packed with umami. Again, start small and taste.
- Tomato Paste: Browning a tablespoon of tomato paste with your aromatics develops a rich, sweet, and savory depth. It’s a foundational umami builder for many soups.
- Marmite/Vegemite: While strong, a tiny smear (like a quarter teaspoon) in a beef or mushroom-based soup can provide an intense umami boost, but use sparingly!
- Fresh Herbs: While dried herbs go in early, fresh herbs like parsley, cilantro, dill, or basil are best stirred in at the very end or used as a garnish. Their volatile oils provide a fresh, vibrant aroma and flavor that cooking would diminish.
- Fat (Healthy Kinds): A drizzle of good quality olive oil or a swirl of butter at the end can add richness and carry flavors to your palate more effectively. For creamy soups, a dollop of crème fraîche or Greek yogurt can provide both richness and a tangy lift.
The Density Dilemma: When Vegetables Just Sit There
Sometimes, even with good seasoning, soup can feel… thin, despite having plenty of ingredients. The vegetables or other components just float around, not contributing fully to the overall texture or body. This is often an issue of integration.
What changed for me was realizing that not all ingredients need to stay perfectly whole. For certain soups, particularly creamy ones or those where you want a richer texture, puréeing a portion of the soup can be transformative. For instance, in a vegetable soup, I might remove about a cup or two of the cooked vegetables, blend them until smooth, and then stir them back into the pot. This thickens the soup slightly and creates a more cohesive mouthfeel, without needing flour or cream.
Another trick for vegetable-heavy soups is to consider the starch component. Adding potatoes, sweet potatoes, or even a small amount of rice or pasta can naturally thicken the broth as they release starch. If you’re making a bean soup, mashing a portion of the beans against the side of the pot (or puréeing them with some broth) before returning them will give you a wonderfully creamy, hearty texture.
Finally, ensuring your vegetables are cut appropriately is crucial. If you want them to dissolve and contribute to body, cut them small. If you want distinct pieces, cut them larger. But always aim for uniformity so they cook evenly.
By intentionally managing the texture and integration of your solid ingredients, you move beyond just ‘stuff in liquid’ to a truly harmonious bowl of soup.
Frequently Asked Questions
Q: My soup is too salty! Can I fix it?
A: Yes, sometimes. The common advice to add a potato wedge is a myth; it won’t absorb salt. The best way to fix overly salty soup is to dilute it. Add more unsalted stock or water and then re-season the other flavors (herbs, spices, acid) to compensate for the dilution. If you have extra unsalted vegetables (like carrots or onions), you can simmer them in the soup for a bit, then remove them. Their starches might absorb a tiny bit of salt, but primarily, they add more unsalted volume.
Q: How do I get that ‘restaurant quality’ depth without hours of simmering?
A: Focus heavily on the initial browning of your aromatics and any meat. This is where the most significant flavor development happens. Use high-quality stock or bouillon. Incorporate umami-rich ingredients like tomato paste, a parmesan rind, or a dash of soy sauce early in the cooking process. Finally, don’t skip the acidic finish like lemon juice or vinegar right before serving.
Q: Can I use dried herbs instead of fresh ones?
A: Yes, absolutely! Dried herbs often have a more concentrated flavor than fresh ones, so use them sparingly. A good rule of thumb is to use one-third the amount of dried herbs as fresh herbs (e.g., 1 teaspoon dried for 1 tablespoon fresh). Add dried herbs with your aromatics early in the sauté process to allow their flavors to bloom in the hot oil. Fresh herbs are often better as a garnish at the end for brightness.
Q: My soup looks greasy. How can I fix this?
A: If your soup is too greasy, you can skim the fat off the top. The easiest way is to chill the soup thoroughly in the refrigerator. The fat will solidify on the surface, making it very easy to lift off with a spoon or spatula. If you need to serve it immediately, you can use a ladle to carefully skim off the surface fat, or draw a paper towel across the surface to absorb some of the excess.
Q: How long can I store homemade soup?
A: Most homemade soups can be safely stored in an airtight container in the refrigerator for 3-4 days. For longer storage, you can freeze most soups for up to 2-3 months. Soups with dairy or pasta may change texture upon freezing and thawing, but generally remain safe to eat. Always cool soup completely before refrigerating or freezing to prevent bacterial growth.
The Unforgettable Bowl
Transforming your homemade soup from bland to brilliant isn’t about magical ingredients; it’s about intentional cooking. It’s about slowing down just enough at the start to build a solid flavor foundation, tasting and adjusting as you go, and understanding how a final flourish of acid or umami can bring everything into harmony. Once you integrate these small shifts – properly browning your aromatics, layering your seasonings, using concentrated liquids, and embracing those crucial finishing touches – you’ll wonder how you ever made soup any other way. Go on, give your next pot the attention it deserves, and prepare for a truly unforgettable bowl.
Written by David Miller
Productivity & Lifestyle Design
An experienced lifestyle columnist who crafts accessible advice for improving daily routines and personal spaces.
You Might Also Like

Why Your Home Still Feels Stale (Even After Cleaning) — And What Actually Works for Real Freshness
Discover why your home still smells stale after cleaning and learn practical, non-obvious strategies for true, lasting freshness.
Why Your Homemade Cookies Are Flat, Not Puffy (And The Simple Shifts That Guarantee Perfect, Puffy Results Every Time)
Ever wonder why your homemade cookies spread too thin? Discover the overlooked factors and simple shifts for achieving perfectly puffy, soft cookies.
Why Your Homemade Sauces Are Greasy, Not Velvety (And The Pro Secrets for Silky Perfection Every Time)
Struggling with greasy, separated sauces? Learn the pro secrets to emulsify like a chef and achieve velvety perfection every time.