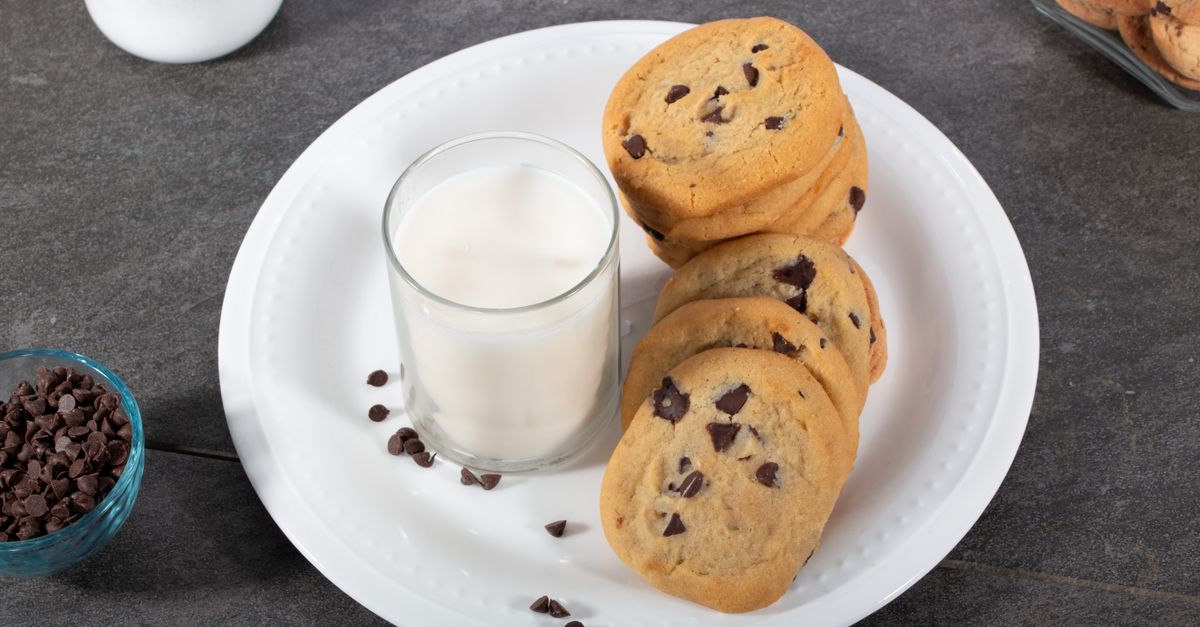
Why Your Homemade Cookies Are Flat, Not Puffy (And The Simple Shifts That Guarantee Perfect, Puffy Results Every Time)
You’ve just pulled a fresh batch of cookies from the oven, anticipating that delightful moment of a golden, slightly puffy treat. Instead, you’re greeted by a tray of thin, crispy discs that spread far too much. It’s a common scenario in home baking, one I’ve personally wrestled with countless times. What feels like a straightforward recipe — flour, sugar, butter, eggs — often yields surprisingly inconsistent results. In my experience, the frustration isn’t just about the aesthetic; it’s about missing that perfect chewiness, that satisfying thickness that makes a cookie truly irresistible.
Most people assume it’s simply ‘too much butter’ or ‘not enough flour.’ While those can be factors, the real culprits are often more subtle, yet surprisingly impactful, details in your process. The mistake I see most often, and one I made for years, is underestimating the science behind cookie structure. It’s not just about mixing ingredients; it’s about how those ingredients interact and behave under specific conditions. What changed everything for me was understanding these underlying principles and making a few precise, actionable shifts. Forget endless recipe hopping; master these fundamentals, and flat, sad cookies will be a thing of the past.
Key Takeaways
- Ensure your butter is truly softened, not melted, to create the necessary air pockets for lift.
- Chill your cookie dough for at least 30 minutes to prevent premature spreading in the oven.
- Measure your flour accurately, preferably by weight, to avoid adding too little or too much structure.
- Use baking powder for immediate lift and spread, and baking soda for chewier, slightly wider cookies.
- Overmixing dough develops gluten, leading to tougher, flatter cookies, so mix just until combined.
The Butter Temperature Trap: Softened vs. Melted (Or Too Cold)
This is perhaps the most critical, yet frequently misunderstood, factor in cookie success. Many recipes call for ‘softened butter,’ but what does that really mean? For years, I just let my butter sit on the counter for 15-20 minutes, thinking it was enough. Sometimes, if I was impatient, I’d zap it in the microwave, ending up with partially melted butter. Both approaches lead to flat cookies, for very different reasons.
The Problem with Melted Butter: When butter is melted or even overly soft, it can’t properly cream with sugar. Creaming is the process of beating butter and sugar together to incorporate air. These tiny air pockets are what give your cookies lift and structure. If your butter is too warm and greasy, it won’t trap air effectively. Instead, it will just coat the sugar crystals, leading to a dense batter that spreads rapidly in the oven because it lacks internal scaffolding.
The Problem with Too-Cold Butter: Conversely, if your butter is too cold, it won’t blend smoothly with the sugar. You’ll end up with lumps of butter, and again, those crucial air pockets won’t form. The result is often a crumbly dough that might not spread enough initially, but then collapses once the butter finally melts, leading to an uneven texture and an overall flatter cookie.
The Solution: Perfectly Softened Butter (The Goldilocks Zone): Your butter should be pliable, but still cool to the touch. When you press it with your finger, it should leave an indentation without your finger sinking all the way through or feeling greasy. It’s typically around 65°F (18°C). The best way to achieve this is to cut your butter into smaller pieces and let it sit on the counter for 30-60 minutes, depending on your room temperature. If you’re truly in a rush, you can gently microwave it for 5-10 second bursts, flipping it each time, but be extremely careful not to melt it. The goal is creamy, not oily, so it can properly aerate and contribute to that ideal puffy texture.
The Dough Chill Factor: Why Patience Prevents Pancake Cookies
I used to be the most impatient baker. Dough mixed? Straight onto the baking sheet and into the oven! This habit was a primary contributor to my flat cookie woes. Chilling cookie dough isn’t just a suggestion; it’s a critical step that fundamentally alters the cookie’s texture and spread.
Why Chilling Works Wonders: When you chill cookie dough, three important things happen:
- Solidifies the Fat: The butter in the dough firms up significantly. When these chilled balls of dough hit a hot oven, the butter takes longer to melt. This extended melting time means the cookies have more opportunity to set and rise before spreading out. Unchilled dough, with its softer butter, melts almost instantly, leading to immediate, excessive spreading.
- Hydrates the Flour: Over time, the flour in the dough absorbs more of the liquid ingredients. This hydration process strengthens the gluten structure and makes the dough less sticky and more manageable. A well-hydrated dough holds its shape better during baking.
- Concentrates Flavor: As the dough rests, the flavors meld and deepen. This is a bonus, but the primary structural benefits are undeniable.
My Go-To Strategy: I always aim to chill my dough for at least 30 minutes, but often prefer an hour or even overnight. For overnight chills, make sure to cover the dough tightly to prevent it from drying out. If you’re in a real pinch, 15 minutes in the freezer can offer a quick fix, but it’s not as effective as a proper fridge chill. The difference in the finished cookie—taller, chewier, and less prone to spreading—is dramatic and absolutely worth the wait.
The Flour Frenzy: Accuracy is Everything
Flour is the primary structural component of your cookies. Too little, and they’ll spread into a greasy puddle; too much, and they’ll be dry and cakey. The problem is, most home bakers measure flour by volume (cups), which is notoriously inaccurate. A cup of flour can vary by as much as 20% depending on how it’s scooped and packed.
The Problem with Volume Measuring: When you scoop flour directly from the bag with a measuring cup, you often compact it, leading to significantly more flour than intended. Conversely, spooning it lightly can result in too little. Both scenarios impact the cookie’s final texture and spread.
The Solution: Weigh Your Flour (And the Spoon & Level Method): Investing in a kitchen scale is, in my opinion, the single best thing a home baker can do to improve consistency. Measuring by weight (grams or ounces) is precise and eliminates variability. Most reputable recipes now include weight measurements. If your recipe only provides volume, here’s a good rule of thumb: 1 cup of all-purpose flour is approximately 120-125 grams.
If a scale isn’t an option, use the ‘spoon and level’ method: Gently spoon flour into your measuring cup until it overflows, then level it off with a straight edge (like the back of a knife). Never pack it down or scoop directly from the bag. This method helps ensure a lighter, more consistent measure of flour, preventing your cookies from either over-spreading or becoming dense and dry.
The Leavening Leverage: Baking Soda vs. Baking Powder
Many cookie recipes use a combination of baking soda and baking powder, or sometimes just one. Understanding their individual roles is crucial for controlling spread and texture. I used to think they were interchangeable, but that’s a common misconception that can drastically alter your results.
Baking Soda (Sodium Bicarbonate): This requires an acid to activate (like brown sugar, buttermilk, or lemon juice) and moisture. It produces carbon dioxide gas quickly, leading to immediate spread and a chewier texture. Cookies with only baking soda tend to spread more, often creating those delightful crinkly edges and a flatter profile. The reaction is fast and furious, providing an initial push.
Baking Powder (Sodium Aluminum Sulfate, etc.): This is a complete leavening agent, meaning it contains both a base (baking soda) and an acid. Most common is ‘double-acting’ baking powder, which reacts twice: once when mixed with liquid, and again when exposed to heat in the oven. This dual action provides a more sustained lift, resulting in puffier, softer cookies with less spread. It creates a finer, more cake-like crumb.
The Strategic Combination: When a recipe calls for both, it’s intentional. The baking soda often provides that initial spread and chewiness, while the baking powder contributes to the lasting height and softness. If your cookies are consistently flat, and you’re using a recipe that relies heavily on baking soda, consider adding a touch more baking powder (or ensuring your baking soda is fresh and reacting properly). In my experience, a slight tweak in the baking powder ratio (say, 1/4 teaspoon extra for every cup of flour) can dramatically increase puffiness without making them cakey, assuming all other factors are correct. Always ensure your leavening agents aren’t expired; they lose potency over time, leading to non-reactive, flat cookies.
The Overmixing Oversight: Gluten Development and Density
In the pursuit of perfectly blended ingredients, it’s tempting to keep the mixer running, especially after adding the flour. However, this is a classic mistake that directly contributes to flat, tough cookies. I once thought ‘thoroughly mixed’ meant beating it into submission, but I was wrong.
What Happens When You Overmix: Flour contains proteins that, when hydrated and agitated, develop into gluten. Gluten provides structure and elasticity, which is fantastic for bread, but detrimental to cookies. The more you mix after adding flour, the more gluten develops. This creates a tougher, chewier texture, and critically for our flat cookie problem, it makes the dough less likely to hold onto the air pockets created during creaming. The developed gluten forms a strong network that resists rising, causing the cookies to spread out rather than up.
The Right Approach: Mix Just Until Combined: After adding the dry ingredients to the wet, mix on low speed just until no streaks of dry flour remain. This typically takes only 30-60 seconds. You might even see a few small streaks, and that’s perfectly fine. A slightly shaggy dough is preferable to an overmixed one. For the final few stirs, I often switch to a spatula or wooden spoon to gently fold in any remaining flour or mix-ins (like chocolate chips). This gentle approach ensures minimal gluten development, preserving those essential air bubbles and leading to a tender, puffy cookie every time.
Frequently Asked Questions
Q1: Can I use cold eggs directly from the fridge?
A1: While not as critical as butter, cold eggs can affect the emulsion of the butter and sugar, making it harder to cream properly. Room temperature eggs (let them sit out for 20-30 minutes or warm in a bowl of warm water for 5 minutes) incorporate more smoothly into the dough, leading to a more uniform batter and better texture. This is a small detail that makes a noticeable difference.
Q2: My cookies are still flat even after chilling. What else could be wrong?
A2: If chilling isn’t enough, double-check your oven temperature. Many home ovens run hot or cold, which can dramatically affect baking. Invest in an inexpensive oven thermometer to verify accuracy. A too-hot oven can cause cookies to spread quickly before setting, while a too-cold oven might cause excessive spreading as butter melts slowly. Also, ensure your baking sheets aren’t too hot between batches; cool sheets prevent premature spreading.
Q3: Does the type of baking sheet matter for cookie spread?
A3: Absolutely. Darker baking sheets absorb more heat and can cause cookies to brown and spread faster. Lighter-colored, heavy-gauge aluminum baking sheets are generally preferred for even baking and less spread. Also, avoid greasing your baking sheets unless the recipe specifically calls for it; excess grease can contribute to spreading. Parchment paper or silicone baking mats are excellent non-stick alternatives that also promote even baking.
Q4: How does sugar type affect cookie spread and puffiness?
A4: Different sugars behave differently. Granulated sugar tends to promote more spread and crispiness. Brown sugar, with its molasses content, adds moisture and a slight acidity, which interacts with baking soda to create a chewier, slightly thicker cookie. Recipes using a higher ratio of granulated sugar might naturally yield flatter cookies, while more brown sugar will lead to puffier, chewier results. Adjusting your sugar ratio slightly towards brown sugar can help with puffiness if you’re consistently getting flat cookies.
Q5: Can using too much sugar make cookies flat?
A5: Yes, a higher ratio of sugar to fat and flour can definitely lead to flatter, crispier cookies. Sugar melts and spreads as it bakes, and too much of it can overpower the structural integrity provided by the flour and leavening agents, causing the cookies to spread excessively. If you suspect this is the issue, try slightly reducing the sugar in your next batch (by about 10-15%) or ensuring your other ingredients are perfectly balanced.
In the end, achieving that perfect puffy, soft cookie isn’t a matter of luck but rather a mastery of a few key baking principles. By focusing on the nuances of butter temperature, the power of chilling, precise flour measurement, understanding leavening agents, and gentle mixing, you can transform your baking results. Next time you’re in the kitchen, remember these shifts, and prepare to pull out a tray of cookies that are exactly what you dreamed of: perfectly puffy, wonderfully soft, and utterly delicious. Happy baking!
Written by Emily White
Mindfulness & Personal Growth
A meticulous editor with a background in educational publishing, ensuring clarity and accuracy in every piece.
You Might Also Like

Why Your Home Still Feels Stale (Even After Cleaning) — And What Actually Works for Real Freshness
Discover why your home still smells stale after cleaning and learn practical, non-obvious strategies for true, lasting freshness.
Why Your Homemade Sauces Are Greasy, Not Velvety (And The Pro Secrets for Silky Perfection Every Time)
Struggling with greasy, separated sauces? Learn the pro secrets to emulsify like a chef and achieve velvety perfection every time.
Why Most Budget Camping Coolers Fail (And What Actually Keeps Things Cold for Days)
Stop wasting money on flimsy coolers. Learn the truth about why budget models disappoint and discover what truly keeps your food and drinks cold for days.