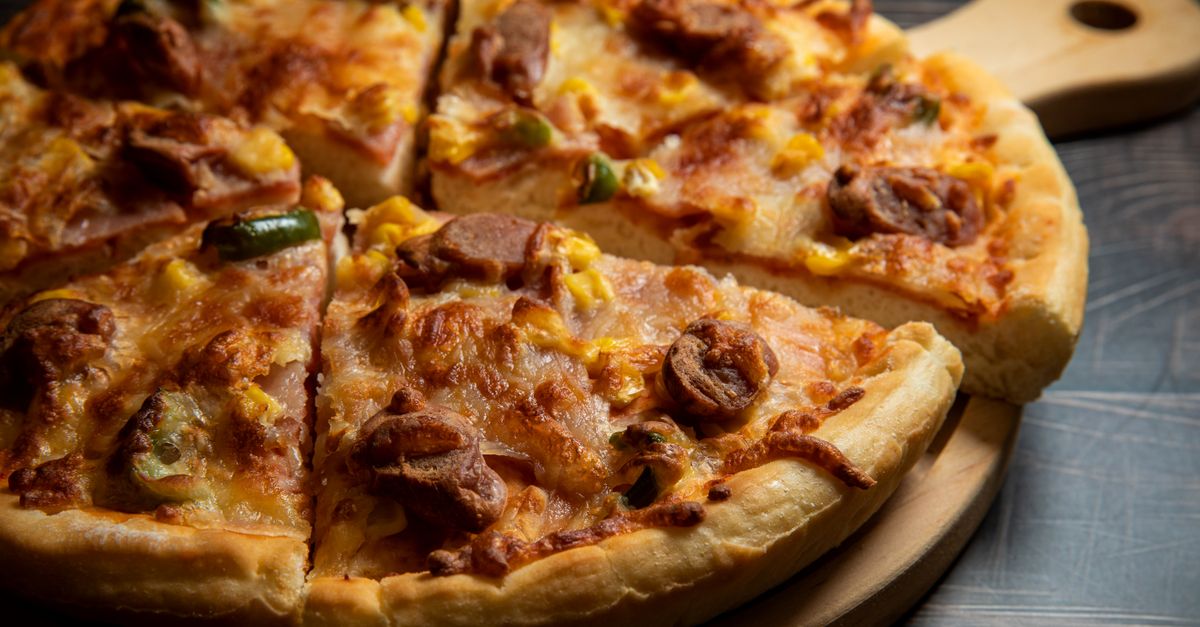
Why Your Homemade Pizza Crust Isn't Crispy (And The Pro Secrets That Deliver Pizzeria-Quality Crunch Every Time)
Is there anything more disappointing than pulling a beautifully topped pizza out of your oven, only to find the crust is limp, chewy, or worse, soggy? You followed the recipe, used good ingredients, and the cheese is perfectly melted, but that satisfying crunch just isn’t there. I’ve been there countless times, staring at a floppy slice, wondering where I went wrong. For years, my homemade pizzas were a game of Russian roulette – sometimes decent, mostly just… okay. I tried every trick: higher oven temps, different flours, longer kneads. But the real secret, I discovered, isn’t just one magic bullet; it’s a combination of often-overlooked techniques that the pros master.
Most home bakers focus on the dough recipe itself, believing a good formula guarantees a crispy crust. While a good recipe is foundational, it’s the process – how you handle the dough, how you cook it, and what you cook it on – that truly elevates your pizza from ‘good attempt’ to ‘wow, did you order this?’ What changed everything for me wasn’t a new ingredient, but a deep dive into the physics of crust crispness and the practical wisdom of seasoned pizzaiolos. I realized my biggest mistakes were in areas I barely considered, like how much moisture I was letting linger, or the sheer lack of sustained, intense heat.
Key Takeaways
- The right baking surface (pizza steel or stone, preheated for an hour) is non-negotiable for delivering the intense, sustained heat needed for crispness.
- Controlling dough hydration, especially for home ovens, and optimizing the dough’s initial stretch prevents excess moisture from creating a soggy base.
- A longer, slower cold fermentation (24-72 hours) develops complex flavors and improves gluten structure, contributing to a better texture.
- Strategic use of high heat, starting with a very hot oven and finishing with precise toppings, ensures the crust cooks thoroughly before the cheese burns.
- Understanding carryover cooking and resting the pizza briefly allows the crust to firm up and prevents internal steam from making it soggy.
Your Baking Surface: The Unsung Hero of Crispness
When I first started making pizza at home, I used a standard metal baking sheet. My crusts were consistently soft and pale. I thought it was my dough, but the real culprit was the abysmal heat transfer of that flimsy sheet. A crispy crust demands intense, sustained heat directly to the base, mimicking a professional pizza oven. Your home oven, even at its highest setting, struggles to provide this without the right conduit. This is where a pizza steel or thick pizza stone comes in, and frankly, it’s non-negotiable for serious home pizza makers.
My game truly changed when I invested in a 3/8-inch thick pizza steel. Stones are good, but steel conducts heat far more efficiently and retains it better, meaning it can deliver a powerful burst of energy to the dough the moment it touches down. The mistake I see most often is people not preheating their stone or steel long enough. I used to just toss it in when I preheated the oven for 15-20 minutes. Wrong. My oven needs a full one hour at its maximum temperature (usually 500-550°F / 260-290°C) with the steel inside. This allows the steel to truly saturate with heat, becoming a scorching-hot surface ready to instantly set the crust. This initial shock of heat creates the characteristic bubbling and browning that leads to crispness, preventing the dough from slowly steaming and becoming dense.
Think of it like this: searing a steak. You wouldn’t put a steak on a lukewarm pan and expect a beautiful crust, would you? Pizza crust is no different. That intense, immediate heat from a fully preheated steel or stone causes the water on the surface of the dough to instantly vaporize, forming tiny steam pockets that puff up the crust, and then the sugars begin to caramelize, leading to browning and that glorious crunch. Without it, your dough simply bakes slowly, drying out without ever achieving that desired structural integrity and crispness.
Hydration and Handling: Taming the Wet Beast
Many popular pizza dough recipes boast high hydration levels (70% water to flour or more) for a tender, airy crumb, which is fantastic for Neapolitan-style pizzas cooked in super-hot wood-fired ovens. However, in a conventional home oven, that much water can be your enemy for crispness. In my experience, a dough hydration between 60-65% works best for achieving a consistently crispy crust in a home setup. Any higher, and you’re battling excess moisture that turns your crust soggy before it can properly crisp.
Beyond the initial hydration, how you handle the dough also makes a huge difference. The mistake I made for years was over-flouring my peel, or worse, using cornmeal or semolina too liberally. While these help prevent sticking, too much acts like tiny ball bearings, absorbing moisture from the dough and creating a barrier that prevents direct contact with the hot baking surface. The result? A grainy, unevenly cooked, and ultimately less crispy base.
What changed everything for me was minimalist dough handling and a very quick transfer. Instead of dumping flour, I now use just a light dusting on the peel and work quickly. After stretching the dough, immediately transfer it to your lightly floured peel, top it lightning-fast, and launch it into the oven. The less time the dough sits on the peel absorbing flour/semolina, the better. Also, ensure your dough is stretched evenly. Thin spots burn, thick spots stay chewy. A consistent thickness (about 1/8 to 1/4 inch, depending on your preference) ensures even cooking and a uniform crispness across the entire crust.
Cold Fermentation: The Secret to Flavor and Structure
Many beginner pizza recipes suggest a quick 1-2 hour rise. While this gets the job done, it leaves a lot on the table when it comes to flavor development and crust texture. If you want truly pizzeria-quality crispness and flavor, cold fermentation in the refrigerator is a non-negotiable step.
I typically ferment my dough balls for 24 to 72 hours in individually oiled containers in the fridge. This slow, cool rise does several crucial things: it significantly develops complex flavors, transforming a bland dough into one with nuanced, slightly tangy notes. More importantly for crispness, it allows the gluten structure to relax and strengthen over time, leading to a dough that’s easier to stretch thinly without tearing and results in a more open, airy crumb structure that crisps up beautifully.
The mistake I used to make was trying to rush the process. I’d proof the dough at room temperature for a couple of hours and wonder why my crust lacked depth. The difference with cold fermentation is profound. The longer the cold ferment, the more extensible the dough becomes, and the more robust its gluten network. When this highly developed dough hits a super-hot surface, it expands rapidly, creating those desirable airy pockets that give a crispy crust its delicate bite, rather than a dense, chewy interior.
The High Heat Finish: Oven Racks and Broilers
Your home oven is not a commercial pizza oven, which can reach 700-900°F (370-480°C) and cook a pizza in 90 seconds. We have to be clever to compensate for this limitation. Simply setting your oven to 500°F and hoping for the best isn’t enough. It’s about maximizing and directing the available heat.
My process involves placing the pizza steel on the top rack of the oven, allowing it to get intensely hot. This positioning not only scorches the bottom of the crust but also brings the top of the pizza closer to the broiler element. Once the pizza is launched onto the preheated steel, I immediately turn on the broiler for the first 2-3 minutes. This simultaneous top and bottom heat assault is crucial. The broiler quickly cooks the top of the pizza, melting the cheese and cooking the toppings, while the steel crisps the bottom.
The mistake I used to make was not using the broiler at all, or only turning it on at the very end. This often resulted in a perfectly cooked bottom but undercooked, pale toppings, or vice-versa. By using the broiler from the start, you get intense heat from both directions. After the initial broiler blast, I switch back to the regular bake setting for another 2-4 minutes, or until the crust is golden brown and the cheese is bubbly. This two-pronged heat strategy ensures the entire pizza cooks quickly and evenly, creating that desired crispy texture without burning one part while undercooking another. This aggressive heat is key to preventing the toppings’ moisture from steaming the crust into submission.
Strategic Topping and Post-Bake Management
Even with a perfect dough and optimal heat, you can sabotage your crispy crust with poor topping choices and post-bake handling. The biggest mistake here is overloading the pizza with wet ingredients.
In my experience, less is more, especially for your first few crispy crust attempts. High-moisture toppings like fresh mozzarella, certain vegetables (mushrooms, bell peppers), or too much sauce can release water onto the dough during baking, turning your beautiful crust soggy. If you must use fresh mozzarella, blot it dry first. For watery vegetables, consider pre-sautéing them to reduce their moisture content.
Also, don’t cut your pizza immediately after taking it out of the oven. The mistake I used to make was slicing it the moment it hit the cutting board. This releases steam from the interior of the crust, which then gets trapped underneath and makes the crust soggy. Instead, let your pizza rest on a wire rack for 2-3 minutes. This allows the steam to escape, preventing condensation and helping the crust to firm up and retain its crispness. Think of it as carryover cooking – the residual heat continues to develop the crust’s structure, allowing it to dry out slightly and become truly crispy. It’s a small step, but it makes a huge difference in the final texture of that coveted crunch.
Frequently Asked Questions
Q: Can I use a regular baking sheet for a crispy crust?
A: While technically possible, it’s very difficult to achieve a truly crispy crust on a regular baking sheet. It simply doesn’t retain or transfer heat efficiently enough. A pizza steel or thick pizza stone is highly recommended for significantly better results.
Q: What’s the ideal dough thickness for a crispy crust?
A: For a truly crispy, New York-style or Roman-style crust, aim for a relatively thin stretch, usually between 1/8 to 1/4 inch (about 3-6mm). Thicker doughs tend to be chewier rather than crispy, especially in home ovens.
Q: How can I prevent my dough from sticking to the pizza peel?
A: Use a very light dusting of flour, semolina, or cornmeal on the peel. The key is to work quickly once the pizza is on the peel – stretch, top, and launch within 60-90 seconds. A wooden peel can also be less sticky than metal.
Q: What’s the best temperature for baking a crispy crust pizza in a home oven?
A: Always preheat your oven to its absolute highest setting (usually 500-550°F or 260-290°C) with your pizza steel or stone inside for at least one hour. Utilizing the broiler for the first few minutes can also mimic the top heat of a professional oven.
Q: Does sugar in the dough help with crispness?
A: A small amount of sugar (around 1-2% of the flour weight) can aid in browning and contribute to a crispier texture by caramelizing at high temperatures. However, too much sugar can lead to premature burning of the crust before the interior is fully cooked.
Conclusion
Achieving that elusive pizzeria-quality crispy crust at home isn’t about finding a secret ingredient; it’s about understanding and implementing a series of precise techniques that address heat transfer, moisture management, and dough development. From a super-hot pizza steel to careful dough handling and strategic use of your oven’s broiler, each step contributes to the ultimate goal: a base that can stand up to your toppings with a satisfying crunch. Don’t be discouraged by past floppy failures. Start by investing in a quality baking surface, master the cold ferment, and be mindful of moisture. You’ll be amazed at the difference it makes. Now go forth and create some truly spectacular, crispy pizzas!
Written by David Miller
Productivity & Lifestyle Design
An experienced lifestyle columnist who crafts accessible advice for improving daily routines and personal spaces.
You Might Also Like

Why Your Home Still Feels Stale (Even After Cleaning) — And What Actually Works for Real Freshness
Discover why your home still smells stale after cleaning and learn practical, non-obvious strategies for true, lasting freshness.
Why Your Homemade Cookies Are Flat, Not Puffy (And The Simple Shifts That Guarantee Perfect, Puffy Results Every Time)
Ever wonder why your homemade cookies spread too thin? Discover the overlooked factors and simple shifts for achieving perfectly puffy, soft cookies.
Why Your Homemade Sauces Are Greasy, Not Velvety (And The Pro Secrets for Silky Perfection Every Time)
Struggling with greasy, separated sauces? Learn the pro secrets to emulsify like a chef and achieve velvety perfection every time.