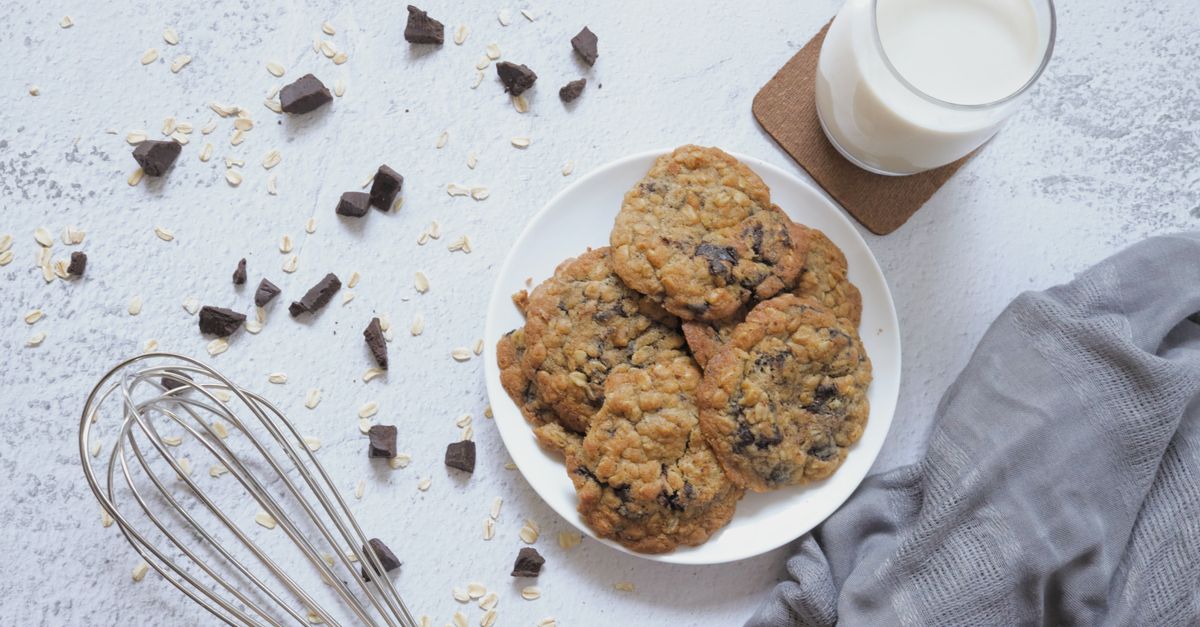
Why Your Homemade Cookies Are Flat (And The Simple Fixes That Guarantee Perfect, Puffy Results Every Time)
There’s nothing quite like the promise of a warm, perfectly baked chocolate chip cookie. You envision that ideal balance: golden-brown edges, a slightly gooey center, and, crucially, a delightful puffiness that signals a treat worth savoring. But then, it happens. You pull your baking sheet from the oven, and there they are: sad, thin discs, melted into a flat, greasy puddle. It’s a common baking heartbreak, one I’ve personally experienced more times than I care to admit.
For years, I’d follow recipes to the letter, yet my cookies consistently came out flat. I blamed my oven, the recipe, even the phase of the moon. It wasn’t until I started to look beyond the obvious ingredients and into the why behind each step that I finally cracked the code. The truth is, often the culprits behind flat cookies aren’t a lack of baking talent, but rather a few subtle, easily correctable missteps that almost everyone makes.
In my journey from flat-cookie despair to consistently puffy perfection, I discovered that small details make a monumental difference. It’s not about complex techniques, but about understanding the science just beneath the surface of your dough. This isn’t just a list of tips; it’s a breakdown of the most common, yet overlooked, reasons your cookies are failing to rise, and the actionable, proven solutions that will transform your baking results every single time.
Key Takeaways
- Ensure butter is at cool room temperature, not melted, to properly aerate dough and support structure.
- Chill your cookie dough for at least 30 minutes to solidify fats and prevent premature spreading in the oven.
- Use precise measurements for all ingredients, especially flour, and ensure baking soda/powder is fresh.
- Bake on a cool, parchment-lined baking sheet, avoiding hot sheets or greased surfaces that encourage spreading.
Your Butter is Too Warm (Or Melted)
This is, by far, the most frequent offender I encounter when troubleshooting flat cookies. Many recipes call for “softened butter,” and it’s easy to interpret that as butter that’s practically liquid. However, this is a critical mistake.
The Problem: Butter that is too soft or, worse, melted, lacks the structure necessary to trap air when creamed with sugar. That trapped air is what creates tiny pockets in your dough, which then expand in the oven, giving your cookies their lift and puffy texture. If your butter is too warm, these air pockets collapse before they even hit the oven, leading to a denser, flatter dough. Furthermore, overly soft butter will melt too quickly in the oven, causing your cookies to spread out rapidly before the flour and eggs have a chance to set their structure.
- My Experience: I used to pull butter straight from the microwave, thinking a quick zap was fine. My cookies always spread into thin, greasy wafers. The moment I started being precise about butter temperature, everything changed. I now plan ahead, leaving butter out for about 30-60 minutes, or until it yields slightly to gentle pressure but still holds its shape. Think of it like a firm handshake, not a wet noodle.
The Fix: Your butter should be at a cool room temperature, ideally around 65-68°F (18-20°C). It should be soft enough to cream smoothly with sugar but still firm enough to hold a slight indentation when pressed with your finger. If you forgot to take it out, don’t microwave it into oblivion. Instead, cut it into small cubes and let it sit for 10-15 minutes, or use a technique like beating it gently in a stand mixer for a minute to warm it slightly without melting.
You’re Skipping the Dough Chilling Step
I know, the immediate gratification of fresh cookies is tempting. But skipping the chilling step is a direct route to flat cookie land.
The Problem: Chilling cookie dough serves multiple crucial purposes. First, it solidifies the butter, making it harder for the cookies to spread too quickly when they hit the heat of the oven. When the cold butter slowly melts, it releases steam, which helps to leaven the cookies and create that desired chewiness. Second, chilling allows the flour to fully hydrate, which strengthens the gluten structure. A stronger structure means the cookies can hold more air and steam, resulting in a taller, chewier, and puffier cookie. Third, and often overlooked, chilling concentrates the flavors, leading to a richer, more complex taste.
- My Experience: I was notoriously impatient. Dough straight from the mixer to the oven. Every. Single. Time. My cookies were flat, chewy in a bad way, and tasted… unidimensional. The first time I chilled dough for an hour, I thought it was a waste of time. But the difference was profound. Now, a minimum of 30 minutes is non-negotiable, and I often chill for 24 hours for next-level results.
The Fix: Always chill your cookie dough. Even 30 minutes in the refrigerator can make a noticeable difference. For optimal results, aim for at least 2-4 hours, or even overnight. If you’re really pressed for time, flash-chilling the scooped dough balls in the freezer for 10-15 minutes can help. This gives the fats a chance to firm up, slowing down the spread in the oven and allowing the cookies to bake up thicker.
Your Baking Leaveners Are Old or Incorrect
Baking soda and baking powder are the unsung heroes of cookie structure, and if they’re not pulling their weight, your cookies won’t either.
The Problem: Baking soda and baking powder are chemical leavening agents that react with acids (baking soda) or liquids (baking powder) and heat to produce carbon dioxide gas. These gas bubbles get trapped in the dough, causing it to rise. If your leaveners are old, they lose their potency and won’t produce enough gas, resulting in flat, dense cookies. Using the wrong leavener or an incorrect amount can also throw off the balance of the recipe, affecting spread and texture.
- My Experience: I used to keep baking soda in my fridge indefinitely for odor absorption, then scoop it out for cookies. Unsurprisingly, my cookies were consistently flat. Now, I keep a dedicated container for baking soda in the pantry and replace it every 6 months. For baking powder, I learned the simple water test: if it doesn’t fizz, it’s dead.
The Fix: Check the expiration dates on your baking soda and baking powder. Even if they’re not expired, their effectiveness can diminish over time, especially if not stored properly (airtight in a cool, dark pantry). To test baking soda, mix a teaspoon with a tablespoon of vinegar; it should bubble vigorously. For baking powder, mix a teaspoon with a tablespoon of hot water; it should fizz immediately. If either doesn’t react, it’s time for a fresh box. Also, ensure you’re using the correct type and amount specified in the recipe. Too much baking soda can cause excessive spread, while too little will result in flatness.
You’re Using a Hot or Greased Baking Sheet
The surface your cookies bake on plays a crucial role in their initial spread.
The Problem: Placing cookie dough on a hot baking sheet (either fresh from the dishwasher or reused immediately after a previous batch without cooling) will cause the butter in the dough to melt almost instantly. This rapid melting means the cookies spread out flat before the flour and eggs have a chance to set and create structure. Similarly, a heavily greased or non-stick baking sheet reduces friction, allowing the dough to spread more freely than desired.
- My Experience: I was guilty of recycling hot sheets straight from the oven, trying to churn out batches quickly. My first batch would be okay, but subsequent batches were progressively flatter. It was a clear pattern once I recognized it. Switching to parchment paper and using cool sheets entirely eliminated this issue.
The Fix: Always use cool baking sheets. If you’re baking multiple batches, have several sheets on hand, or allow the used sheet to cool completely between batches. Running a hot sheet under cold water and drying it thoroughly can speed up the process. Furthermore, I swear by parchment paper. It provides a non-stick surface without adding extra grease, preventing excessive spread and ensuring even baking. A silicone baking mat works similarly well. Avoid greasing your baking sheets unless the recipe specifically instructs you to, as it encourages spreading.
Inaccurate Ingredient Measurement, Especially Flour
Baking is a science, and precision truly matters, especially with flour.
The Problem: While cooking allows for more improvisation, baking relies on exact ratios. Too little flour, and your dough will be too wet and spread excessively. Too much flour, and your cookies might be dry and dense. The common mistake I see is scooping flour directly from the bag with a measuring cup, which compacts the flour and results in using far more than intended. A single extra tablespoon of flour can significantly alter the dough’s consistency and, subsequently, the cookie’s texture and height.
- My Experience: For years, I eye-balled flour, or just used a scoop-and-level method without thought. My cookies were inconsistent, sometimes flat, sometimes dense. Investing in a kitchen scale was a revelation. It removed all guesswork, and my baking became consistently reliable, especially for cookies.
The Fix: Always measure flour by weight using a kitchen scale for the most accurate results. If you don’t have a scale, use the “spoon and level” method: gently spoon flour into your measuring cup until it overflows, then level it off with the straight edge of a knife. Never pack flour into the cup. Be equally precise with other ingredients, especially liquids and leavening agents, as even small deviations can throw off the delicate balance of a cookie recipe.
Overworking the Dough
While creaming butter and sugar is essential, excessive mixing after adding dry ingredients can be detrimental.
The Problem: Once flour is introduced to wet ingredients, gluten begins to develop. Gentle mixing is enough to combine the ingredients, but overworking the dough, especially after adding flour, can lead to excessive gluten development. This results in a tough, dense cookie that doesn’t spread or puff properly. The gluten strands become too strong and elastic, preventing the cookies from expanding and creating a light, airy crumb structure.
- My Experience: I used to think more mixing equaled more uniform dough. I’d let my stand mixer go for minutes after adding flour. My cookies were always disappointingly tough. Now, the moment the flour streaks disappear, I stop. It feels counter-intuitive to stop mixing so soon, but the results speak for themselves.
The Fix: Mix your dry ingredients into the wet ingredients only until just combined. As soon as no dry flour streaks are visible, stop mixing. Overmixing is particularly problematic when using an electric mixer; if possible, switch to a wooden spoon or spatula for the final incorporation of dry ingredients and any add-ins like chocolate chips. A slightly lumpy dough is perfectly fine and often preferred for tender cookies.
You’re Baking on the Wrong Rack and Temperature
The oven environment is just as crucial as the dough itself.
The Problem: Baking on the wrong oven rack can lead to uneven heat distribution. If your cookies are too close to the top heating element, they might brown too quickly on top before developing structure. Too close to the bottom, and they might brown too much on the bottom and spread excessively. An inaccurate oven temperature (too high or too low) can also affect how cookies spread and set. If the oven is too hot, the butter melts too fast, leading to flat cookies before they set. If it’s too cool, the leaveners won’t activate properly, and again, you get flat results.
- My Experience: I relied on my oven’s display temperature, which I later learned was wildly inaccurate. After getting an oven thermometer, I found my oven often ran 25-50 degrees hotter than it claimed. Adjusting to the actual temperature, and always using the middle rack, dramatically improved consistency.
The Fix: Always use an independent oven thermometer to verify your oven’s actual temperature. Most ovens run either hot or cold, and even a 10-degree difference can impact your cookies. Calibrate your oven if necessary, or simply adjust the set temperature based on what your thermometer reads. For most cookies, the middle rack is ideal, ensuring even heat distribution from top and bottom elements. This allows the cookies to rise, spread, and brown uniformly. Avoid overcrowding the oven, as this can lower the overall temperature and lead to uneven baking.
Frequently Asked Questions
Q: Can using stale flour cause flat cookies?
A: While stale flour primarily affects flavor, it can contribute to a slightly denser, less airy texture. However, it’s usually not the primary cause of extreme flatness. Ensure your flour is stored in an airtight container in a cool, dark place to maintain freshness.
Q: My recipe calls for unsalted butter. Can I use salted butter instead?
A: You can, but it will affect the overall salt balance of your cookies. If using salted butter, reduce the amount of added salt in the recipe by about ¼ teaspoon per stick of butter to avoid overly salty results.
Q: What if my cookie dough is too sticky after mixing?
A: A sticky dough can sometimes be a sign of too little flour or too much liquid/fat. Try chilling the dough for an extended period (1-2 hours) as cold dough is less sticky and easier to handle. If it’s still excessively sticky, you might need to re-evaluate your flour measurement technique.
Q: How important is baking parchment paper for preventing flat cookies?
A: It’s extremely important. Parchment paper (or silicone mats) provides a non-stick surface that allows cookies to bake without sticking or spreading too much due to friction with a greased pan. It also aids in even heat distribution and makes cleanup a breeze.
Q: Can altitude affect how my cookies turn out?
A: Yes, absolutely. High altitude baking often requires adjustments, as reduced atmospheric pressure causes leavening gases to expand more rapidly, leading to excessive rising and then collapsing (flatness). You might need to slightly reduce baking soda/powder, increase liquid, or increase flour, depending on your elevation. Look for high-altitude baking adjustments specific to your location.
Remember, baking is an ongoing learning process. Don’t be discouraged by a few flat batches. With these targeted adjustments, you’ll be well on your way to consistently baking perfect, puffy cookies that impress every time. The satisfaction of pulling those golden, plump delights from the oven? Absolutely priceless.
Written by David Miller
Productivity & Lifestyle Design
An experienced lifestyle columnist who crafts accessible advice for improving daily routines and personal spaces.
You Might Also Like

Why Your Home Still Feels Stale (Even After Cleaning) — And What Actually Works for Real Freshness
Discover why your home still smells stale after cleaning and learn practical, non-obvious strategies for true, lasting freshness.
Why Your Homemade Cookies Are Flat, Not Puffy (And The Simple Shifts That Guarantee Perfect, Puffy Results Every Time)
Ever wonder why your homemade cookies spread too thin? Discover the overlooked factors and simple shifts for achieving perfectly puffy, soft cookies.
Why Your Homemade Sauces Are Greasy, Not Velvety (And The Pro Secrets for Silky Perfection Every Time)
Struggling with greasy, separated sauces? Learn the pro secrets to emulsify like a chef and achieve velvety perfection every time.